Sennheiser HD400 Manual do Utilizador
Consulte online ou descarregue Manual do Utilizador para Auscultadores Sennheiser HD400. Line 6 POD® HD300-HD400 Advanced Guide (Rev D Manual do Utilizador
- Página / 81
- Índice
- MARCADORES
- HD300 & POD 1
- Table of Contents 2
- Setup DetailS 5
- Output Mode - Live Options 6
- USB Monitor Level 6
- Footswitch Mode 7
- Pedal Calibration 8
- Factory Restore 9
- Setup Details 10
- FeatureS & Functionality 11
- Smart FX 12
- Noise Gate 13
- FX Loop (POD HD400 Only) 14
- Tap Tempo 14
- Pedal Control 14
- Output Mode Options 15
- L6 LINK™ 15
- POD HD Edit Software 17
- Working With preSetS 19
- Saving Presets 21
- Dit MoDe 23
- SETUP Menu 24
- AMP Menu 24
- FX1, FX2 & FX3 Menus 24
- REVERB Menu 25
- GATE Menu 25
- WAH Menu 26
- VOL Menu 26
- FX Loop Menu (POD HD400 Only) 27
- Send & Return Levels 28
- MIDI DUMP 29
- Mp, cab & Mic MoDelS 31
- AMP Edit Mode 32
- Amp Model Type 33
- Cab Model Selection 33
- Mic Model Selection 33
- E.R. (Early Reflections) 34
- Presence 34
- Master Volume 35
- Bias Excursion 36
- Bypass Volume 36
- Manual Mode 37
- FX Only Mode 38
- AutoFX SETUP Parameter 38
- Amp/Preamp Models 39
- Amp Control Knobs 40
- Cab Models 41
- FX MoDelS 43
- FX Models 44
- Model Select 45
- Smart Harmony 47
- Pitch Glide 48
- Attack Synth (POD HD400 Only) 49
- Synth String 49
- Synth-O-Matic 50
- Bass Octaver 50
- FX2 Models - Reference Table 52
- Common FX2 Parameters 53
- Feedback 54
- FX3 Models - Reference Table 55
- Common FX3 Parameters 56
- Common Reverb Parameters 58
- Wah Models 60
- Sing the looper 61
- The Line 6 USB Audio Driver 63
- Audio Routing 64
- The POD HD Record Send 64
- USB Audio 66
- Run Audio-MIDI Setup: Mac 67
- System Settings: 68
- Line 6 Audio-MIDI Settings 70
- ASIO® Driver Settings 73
- Launch Line 6 Monkey 75
- Login Account 75
- Grab Those Updates 76
- Appendix A: Line 6 Monkey 77
- MIDI SysEx Functionality 79
- Restoring Presets 80
- To restore all Presets 81
Resumo do Conteúdo
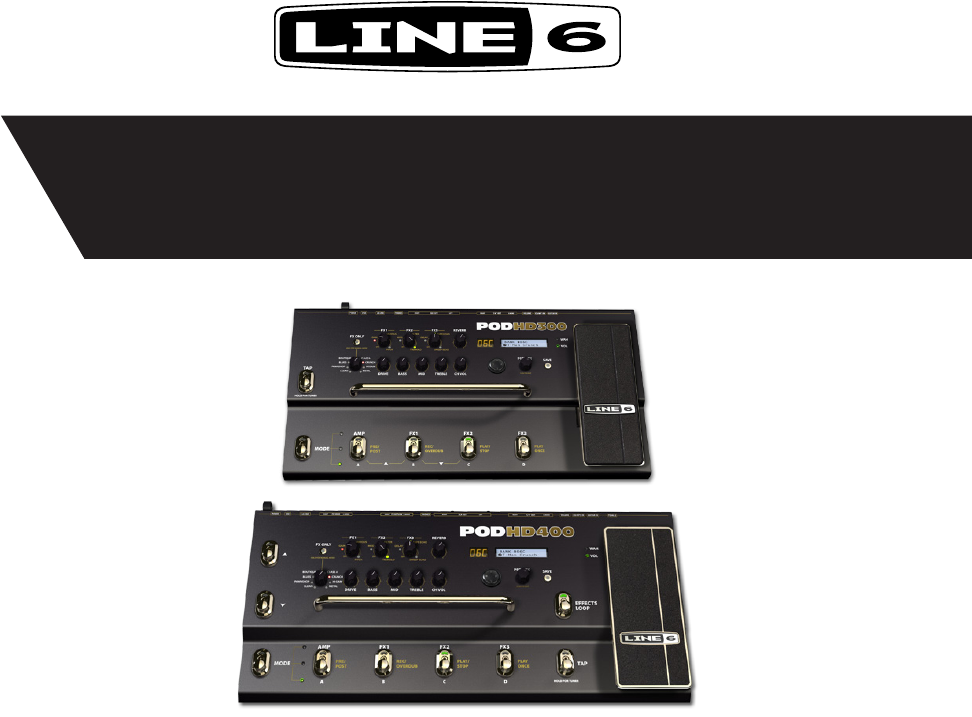
®POD® HD300 & POD® HD400An in-depth exploration of the features & functionality of POD HD300 & POD HD400Electrophonic Limited EditionAdvan
Setup Details1•6 6. Press the pedal firmly all the way forward to click the toe switch and hold this position for a few seconds until you see the next
Features & Functionality2•1FeatureS & FunctionalityIt is recommended that you first review the Pilot’s Handbook included with your device for t
Features & Functionality2•2Smart FXThe FX1, FX2 & FX3 knobs are what we refer to as the “Smart FX” controls, in reference to their clever desi
Features & Functionality2•3• Edit the FX Model’s Parameters - Dive deeper and access numerous parameters for any effect model by pushing the PRES
Features & Functionality2•4FX Loop (POD HD400 Only)The FX Loop built into POD HD400 can be controlled with several options, including “Pre” or “Po
Features & Functionality2•5Pedal 2 (POD HD400 Only)Optionally, you can connect an additional Expression Pedal (such as the Line 6 EX-1) to the PED
Features & Functionality2•6The MASTER VOLUME knob on the back of your device controls the overall level of these outputs. Here are some pointers f
Features & Functionality2•7POD HD Edit SoftwareBe sure to visit line6.com/software to download Line 6 POD HD300 Edit or POD HD400 Edit - the free
Working with Presets3•1Working With preSetSPOD® HD300 & POD® HD400 include the ability to store up to 128 Presets within the device’s
Table of ContentsSetup Details ... 1•1Setup Options ...
Working with Presets3•2Bank & Channel FootswitchesPlace the POD HD footswitches into Preset Mode for hands-free Preset selection by pressing the M
Working with Presets3•3For either POD HD300 or HD400, using these Bank switches will “queue” the selected Bank - no new Preset is loaded until you pre
Edit Mode4•1eDit MoDeWithin this chapter, we’ll cover the Edit Mode within POD® HD400, which provides access to all the editable Tone parameters
Edit Mode4•2SETUP MenuThe parameters in this menu allow configuration of your POD HD hardware. Please also see “Setup Details” on page 1•1.The Edit Mod
Edit Mode4•3REVERB MenuThe REVERB menu offers access to all editable parameters for each Reverb model. Use the Model - Select option to choose the des
Edit Mode4•4DecaySets the Gate Decay. Higher levels result in a longer transition from non-gated to gated audio.WAH MenuThe WAH menu offers selection
Edit Mode4•5• Pre - Positions the Volume effect before the Amp model (and before all other “Pre” designated FX) within the signal ow. • Post - Posi
Edit Mode4•6RoutingConfigure the position of the FX Loop Send/Return.• Pre - Positions the FX Loop before the Amp model (and between FX1 and FX2, if t
Edit Mode4•7MIDI DUMPThis setting configures the specific MIDI SysEx data that is fed to the POD HD MIDI Out port when performing a MIDI Dump. When this
GATE Menu ... 4•3WAH Menu ...
Amp, Cab & Mic Models5•1aMp, cab & Mic MoDelSThis chapter provides details on selecting & editing the exemplary HD Amp & Preamp Models
Amp, Cab & Mic Models5•2Note that some of the classic amplifiers we modeled for POD HD family devices include knobs other than the typical “Treble,
Amp, Cab & Mic Models5•3Amp Model TypeAs the default setting for all Amp Models, this option is set to “Full” to provide the complete sonic chara
Amp, Cab & Mic Models5•4The 8 Mic Model options for each Amp are as follows. Mic ModelsMic NameBased On...*57 On XsShure® SM57 On Axis 57 Off Xs S
Amp, Cab & Mic Models5•5Master VolumeNOTE: This Master Volume parameter, as well as the following several parameters (Sag, Hum, Bias, and Bias Exc
Amp, Cab & Mic Models5•6BiasChanges the Bias of the power tubes. Set to minimum to achieve a very “cold” Class AB biasing. At maximum the amp is o
Amp, Cab & Mic Models5•7Manual ModeAs described earlier, selecting a new Amp Model loads the new Amp, along with default settings for each of the
Amp, Cab & Mic Models5•8FX Only ModeUse the “FX Only” mode if you prefer to keep the Amp, Cab & Mic models’ processing bypassed, such as to us
Amp, Cab & Mic Models5•9Amp/Preamp ModelsTo follow is a table showing the classic amplifiers upon which our HD Amp/Preamp Models are based.* For mo
Line 6, POD, DT50, Vetta, CustomTone, Variax, L6 LINK and Line 6 Monkey are trademarks of Line 6, Inc. All other product names, trademarks and artists
Amp, Cab & Mic Models5•10Amp Control KnobsSome of the classic amps we’ve modeled include special knob controls, therefore, we’ve emulated their be
Amp, Cab & Mic Models5•11Cab ModelsTo follow is a table showing the classic speaker cabinets upon which our Cab Models are based.* POD HD Cab Mode
FX Models6•1FX MoDelSThis chapter provides reference tables & parameter details on all POD® HD FX Models, most of which were derived from the exem
FX Models6•2FX1 Model ParametersJet Fuzz Drive Fdbk Tone Speed OutputSub Octave Fuzz * Drive Bass Sub Treble OutputBuzz Saw * Drive Bass Mid Treble Ou
FX Models6•3FX1 Model ParametersPITCH SwooshSmart Harmony - Key Scale Shift MixPitch Glide Position PedalHeelTo e MixAttack Synth * Speed Freq Wave Pi
FX Models6•4FX1 GAIN Swoosh Models - ParametersThe following parameters are common to most Compressor, Distortion & Fuzz models:• Drive: Adjusts
FX Models6•5The following parameters are common to most EQ models:• Frequency (as well as Low, Mid, High): Selects the center frequency or range
FX Models6•6• Scale: Select the Scale you’d like to use (also see table below).• Shift: Determines the interval value for the desired harmony note.
FX Models6•7• Choose Vol:Glide to have your pedal’s Vol mode control the Pitch Glide effect.• Choose Don’tCtl to use the effect manually, without pe
Setup Details1•1Setup DetailSIn this chapter, we’ll cover the options found within the POD® HD300 & POD® HD400 Setup screen, calibrating your dev
FX Models6•8Growler• Speed: Dials in the speed of the vibrato-y pulse width modulation.• Frequency: Controls the center frequency of the lter.• Q:
FX Models6•9V-TronEach time you strike a new note or chord, the vowel sequence will be “spoken.” You can choose whether to go from Start vowel to End
FX Models6•10FX2 Models - Reference TableBelow is a Reference Table listing all parameters for the FX2 set of models, which includes a complete array
FX Models6•11Common FX2 ParametersWhen you enter Edit Mode for any FX2 model, you’ll see the following common parameters for most (as well as “Model S
FX Models6•12DepthAdjusts the intensity of the pitch-modulation, wobble or throb, depending on the type of effect. Higher settings yield more dramatic
FX Models6•13FX3 Models - Reference TableBelow is a Reference Table listing all parameters for the FX3 set of models, which includes a includes a coll
FX Models6•14Common FX3 ParametersWhen you enter Edit Mode for any FX3 model, you’ll see the following common parameters for most (as well as “Model S
FX Models6•15FeedbackSets the number of repeats for the Delay/Echo. The higher the setting, the greater number of repeats.MixSets the balance of the “
FX Models6•16Reverb Models - Reference TableBelow is a Reference Table listing all parameters for the spacious Reverb set of models.Reverb Model Param
FX Models6•17DecaySets the length of time the reverb effect sustains.ToneAdjusts the overall Tone of the wet reverb signal. Higher settings provide a
Setup Details1•2Output Mode - Live OptionsUse the OUTPUT MODE switch on the back of your POD HD device to configure the type of signal fed to your outp
FX Models6•18Wah ModelsBelow is a list of all Wah models included in the Wah set. Choose the desired Wah model from the Edit Mode - Wah:Model Select m
Using the Looper7•1uSing the looperThe Looper in POD® HD300 & POD® HD400 offers you up to 24 seconds of mono recording time, as wel
Using the Looper7•2Note: When recording in the “POST” mode, it is likely that the Amp & FX modeling will add some substantial gain to your dry sig
USB Audio8•1uSb auDioIn this chapter, we’ll cover the USB audio capabilities of POD® HD300 & POD® HD400. With the installation of the Line 6 USB a
USB Audio8•2Audio RoutingWhen using the POD HD USB connection, the audio driver manages several tasks. The driver feeds the processed guitar signal ou
USB Audio8•3You’ll see the POD HD device and Record Send appear within your audio software - Simply select this Send as the input for the track and yo
USB Audio8•4Mac® - Line 6 Audio-MIDI DevicesLaunch the Line 6 Audio-MIDI Devices utility from within the Mac® System Preferences. This utility provide
USB Audio8•54 Run Audio-MIDI Setup: Mac® Core Audio interface driver settings are configured in the Mac OS® X Audio-MIDI Setup utility. This button lau
USB Audio8•6Mac OS® X Audio-MIDI Setup UtilityPOD HD utilizes the Mac® Core Audio driver type, making it a compatible audio interface for practically
USB Audio8•7B Device Properties: Choose your POD HD device here to allow the Audio Input and Audio Output options display its settings.C Audio Input
Setup Details1•3Footswitch ModeWe’ve offered two types of behaviors for how the MODE footswitch accesses the “Preset,” “Pedal” and “Looper” footswitc
USB Audio8•8Windows® - Line 6 Audio-MIDI DevicesThe following settings are the same for Windows® XP, Windows Vista® or Windows® 7, except where noted.
USB Audio8•91 Device Selector - Select your POD HD device here. If you have more than one supported Line 6 audio device connected, each will be selec
USB Audio8•104 Driver Operation (Windows Vista® & Windows® 7) On Windows® Vista & Windows® 7 you will see a Sound Control Panel button - click
USB Audio8•11You can also click on the Properties button in the Sound dialog to access the default format settings for the POD HD Sample Rate and Bit
Appendix A: Line 6 MonkeyA•1appenDiX a: line 6 Monkey™Line 6 Monkey is the free, intelligent updater software to keep all your Line 6 products, up to
Appendix A : Line 6 MonkeyA•2Register Your HardwareIf you have not already done so, you’ll be prompted to Register your connected Line 6 hardware. It
Appendix A: Line 6 MonkeyA•3As an example, the above screenshot shows Monkey has detected that a newer Firmware - Flash Memory version is available fo
Appendix B: MIDIB•1appenDiX b: MiDiIn this Appendix, we’ll cover the POD® HD300 & POD® HD400 MIDI functionality. Both these POD HD devices include
Setup Details1•4Tap Tempo Light• TpLite - AlwaysOn: The TAP light on the device will flash constantly, showing the current tempo setting. • TpLite
Appendix B: MIDIB•2MIDI Dump - Backing Up PresetsTo perform a MIDI Dump, connect POD HD to your computer’s USB port and prepare your MIDI software to
Appendix B: MIDIB•3To restore all PresetsIf your selected SysEx le contains all 128 Presets (i.e. - you used the MIDI Dump “All” setting above to cre
Setup Details1•5Factory RestoreTo restore POD HD to all its original factory settings, first back up any Presets you’d like to keep (“POD HD Edit Soft
Manuais e produtos relacionados com Auscultadores Sennheiser HD400
 (18 páginas)
 (23 páginas)
 (31 páginas)
 (37 páginas)
(20 páginas)
(29 páginas)
(21 páginas)
(76 páginas)
(37 páginas)
(20 páginas)
(29 páginas)
(21 páginas)
(76 páginas)


 (32 páginas)
(28 páginas)
(10 páginas)
(32 páginas)
(28 páginas)
(10 páginas)
© 2020, manymanuals-pt.com. Todos os direitos reservados. | 0.152 s |
 Manymanuals.com
 Manymanuals.de
 Manymanuals.fr
 Manymanuals.it
 Manymanuals.pl
 Manymanuals.cz
 Manymanuals.es
 Manymanuals-pt.com
Comentários a estes Manuais